Local Kubernetes on Mac: a Multi-Node Cluster with UTM

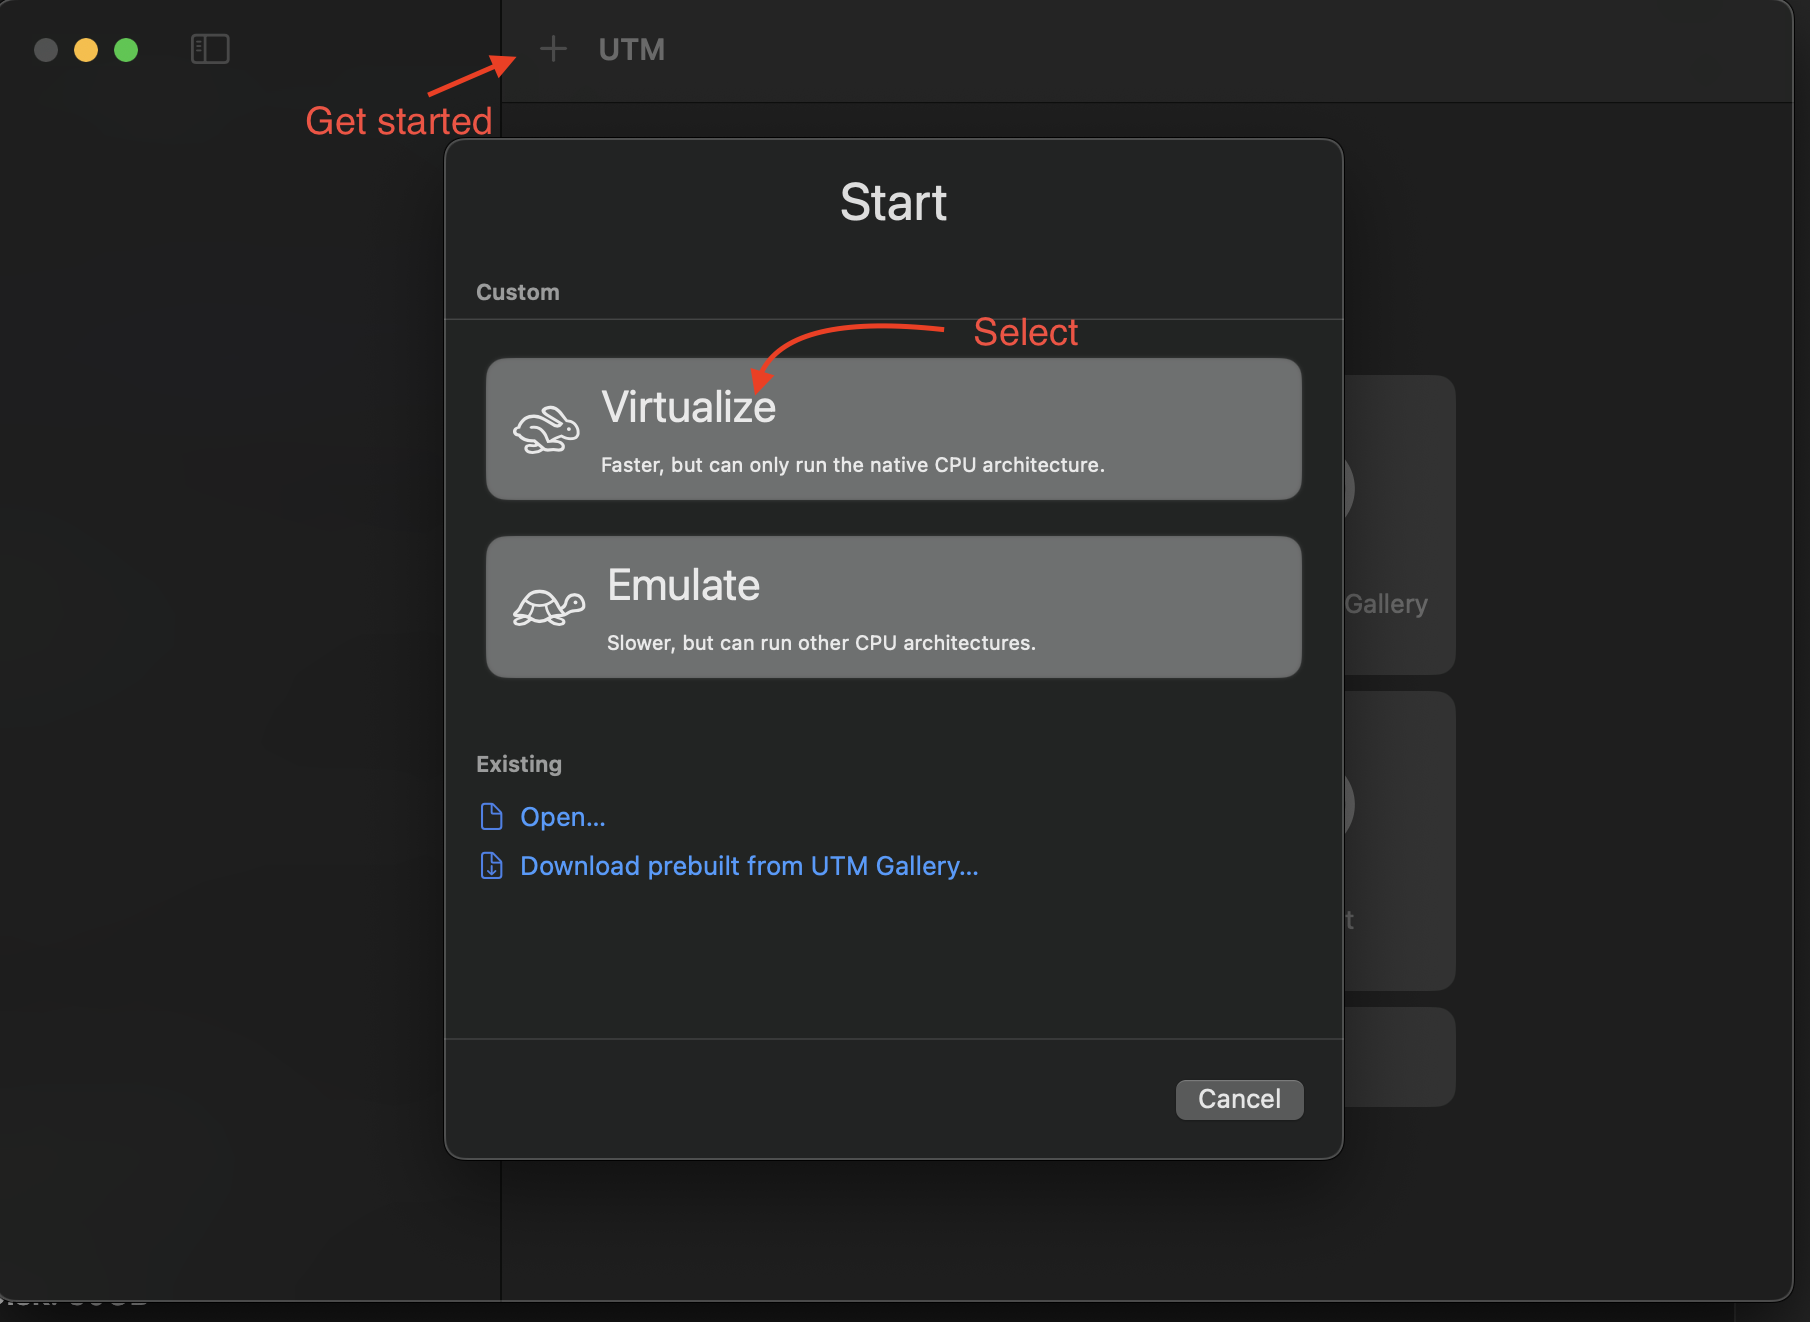
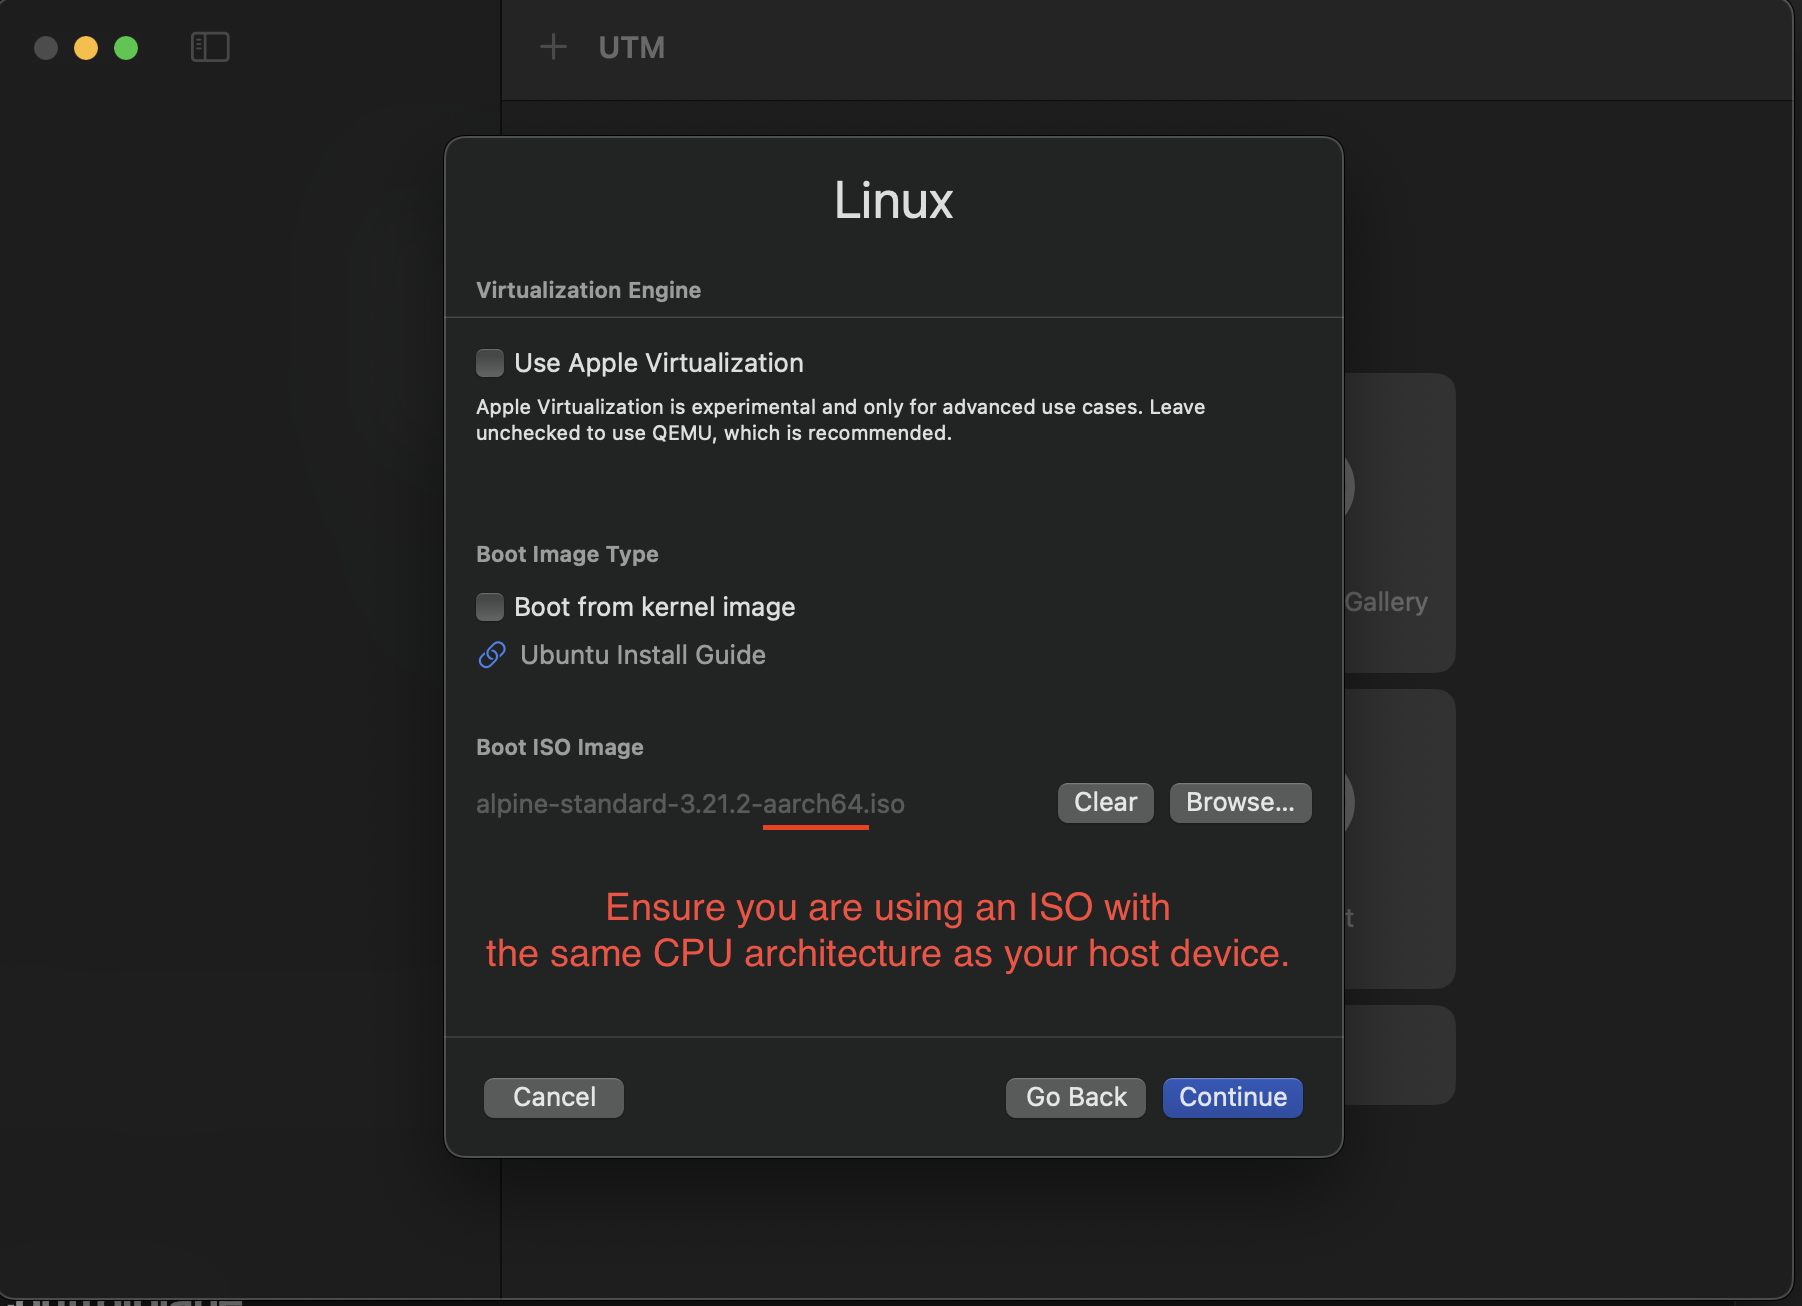
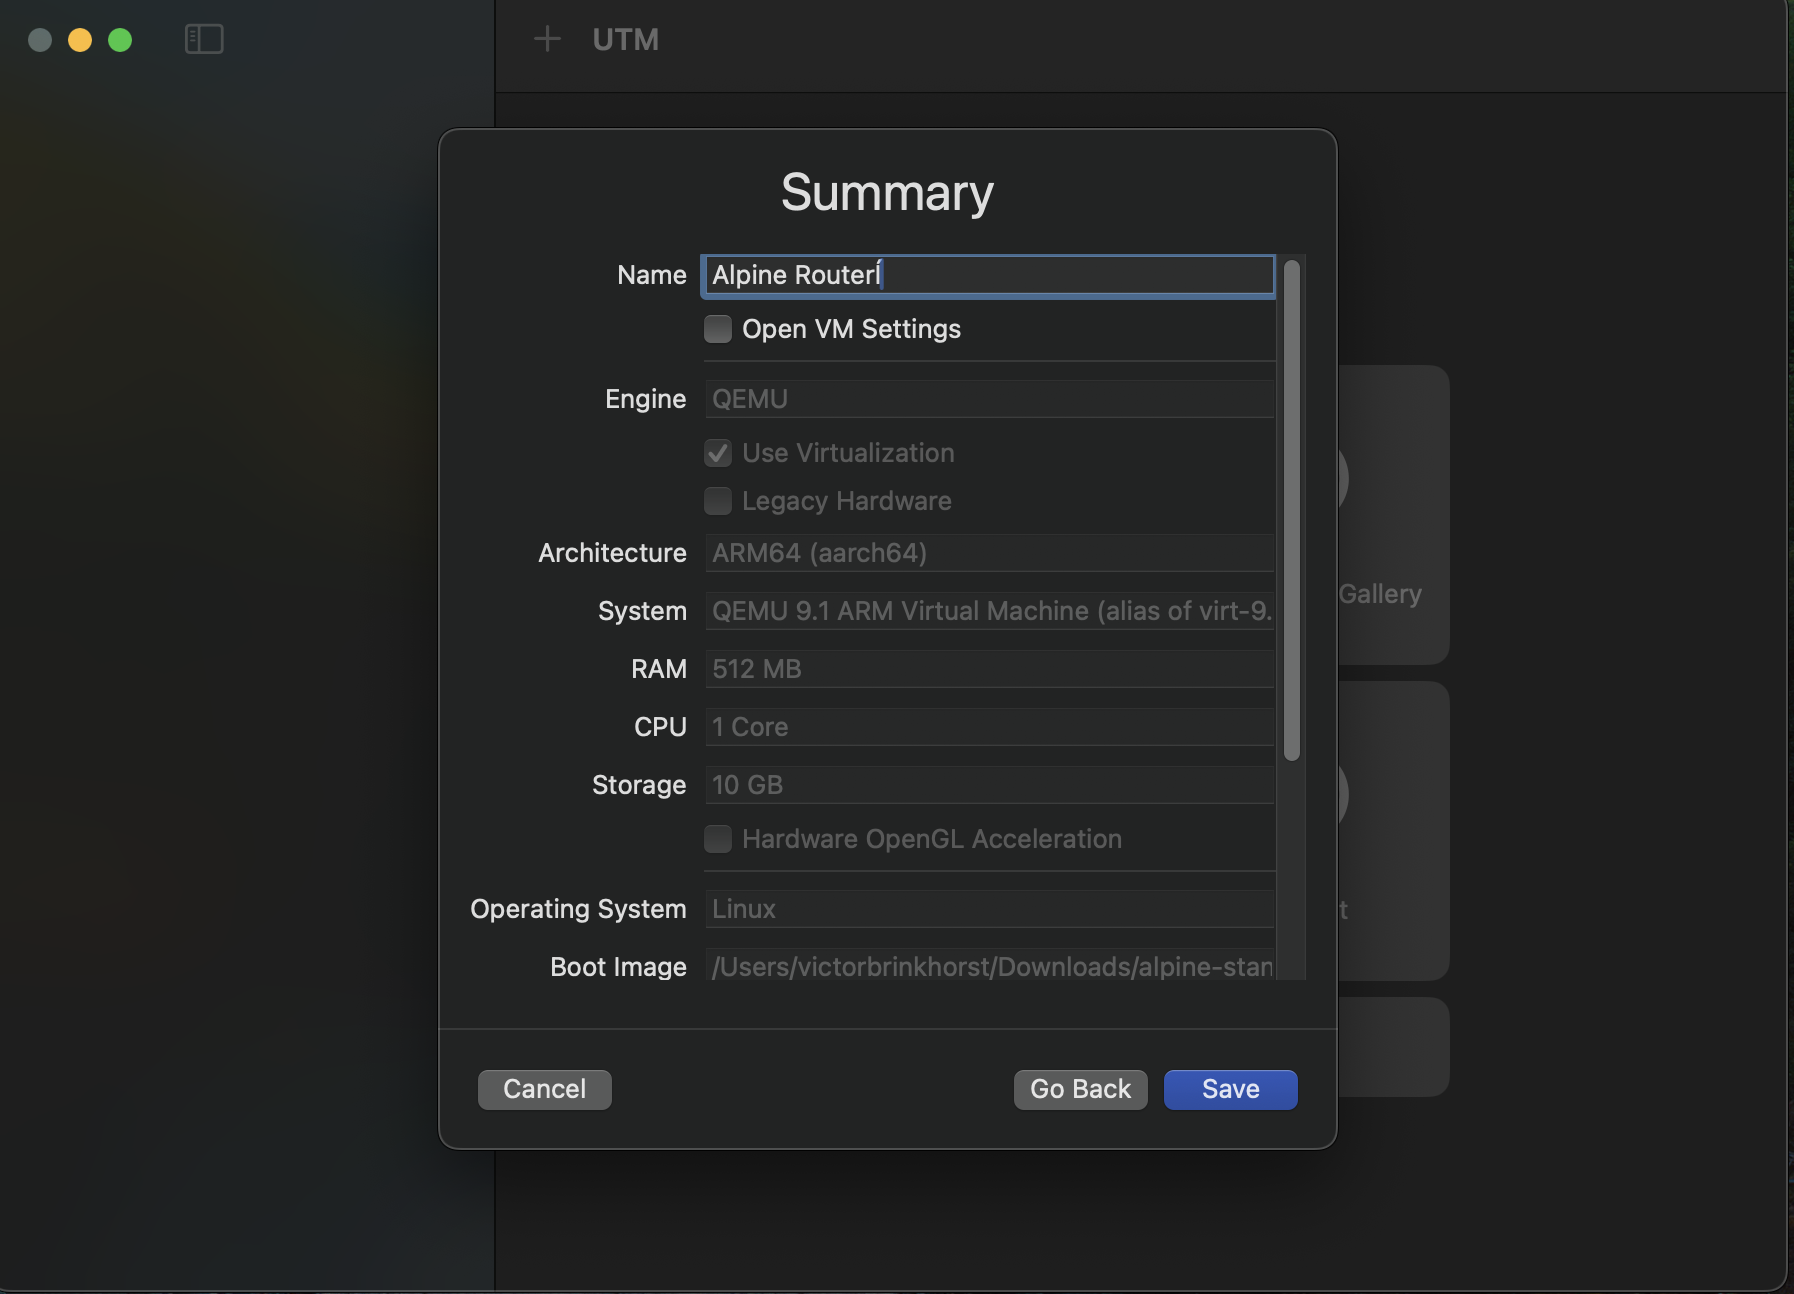
Today we’re going to configure a Kubernetes cluster using virtual machines on our MacOS host. We are going to use UTM which utilises QEMU, a type-2 hypervisor to actually virtualise the new machines. I will be using a 2024 Macbook Pro with the Apple Silicon M4 chip, this guide can also be followed on older M-chips or Intel CPU’s.
Virtual Machines vs Dockerized Kubernetes
There is an abundance of easy to use tools out there to quickly spin up a local Kubernetes cluster. You may have heard of Minikube, KinD (Kubernetes-in-Docker) or K3S. Running Kubernetes inside actual VMs simulates a more realistic production environment. Each VM has their own kernel and networking stack, this doesn’t just offer a higher level of protection to your host machine it also allows us tighter controls over the OS & Kernel.
We’re going to be installing the Kubernetes ( v1.32 *) cluster using kubeadm, meaning that all of our control plane components are going to be running as Pods on the cluster (in the kube-system namespace, more about that later).
• At the time of writing, v1.32 is the latest minor release. Other minor versions can be installed following this guide, you just need to swap out the version numbers where specified. Learn more about Kubernetes versioning.
Prerequisites
Don’t know your CPU architecture? Run uname -m in a terminal of your choice.
💡 Got an Apple Silicon M-chip ( arm64 )? Use aarch64 where there is no specific arm64 download available.
A MacOS machine (Intel or Apple Silicon)UTMUbuntu Server & Alpine Linux Standard ISO files matching your cpu architecture
Installation
This section will cover the installation of three virtual machine types. The Router will provide internet & inter-node connectivity to our Kubernetes cluster, using a router like this will allow us to connect to any internet device without the inter-node network being disrupted (i.e by changing IP addresses or firewall rules).
The control plane and worker node(s) are standard Kubernete…

 点赞
点赞 收藏
收藏 点踩
点踩 分享
分享