Talos Linux on Proxmox with Terraform

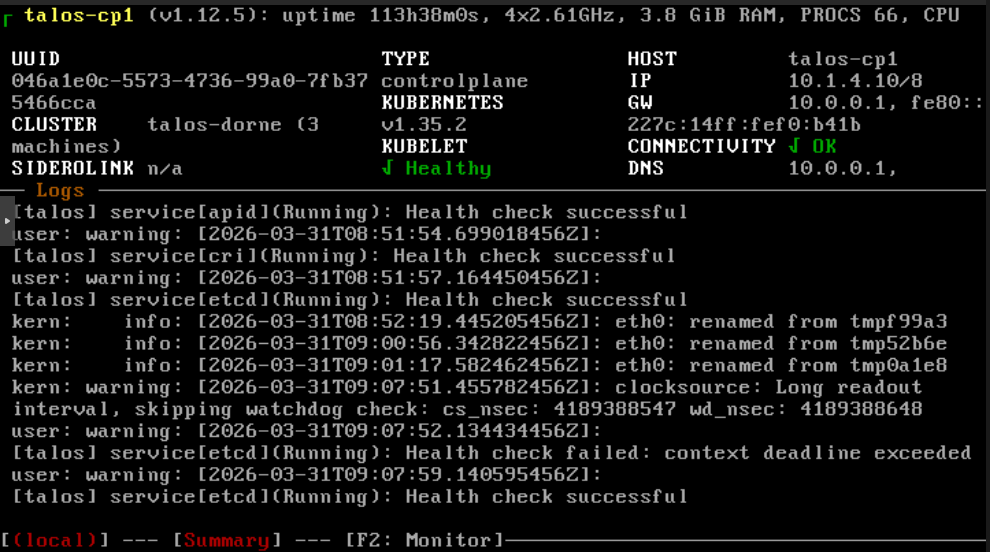
It’s time to get the VMs rolling.
As stated in the intro I’m going to use Terraform to provision VMs and to configure Talos Linux. We’ll end up with this simple interface:
# Create VMs and configure Talos nodes
terraform apply
# Destroy and reset all
terraform destroy
I run these commands manually on my machine. It’s possible to add these to a CI but I like the faster feedback of running them directly.
There will also be some extra complexity and bootstrap commands as I want to use Cilium for service routing, the Container Network Interface (CNI), and in the future for the Gateway API. (Is it worth it? I don’t know, but I’m too committed to the setup to change it now.)
In this post we’ll go through a setup of three control plane nodes on a single Proxmox host, without any worker nodes. It’s a good starting point if you want to start playing with Kubernetes, but you may want to alter that in the future.
As I’m writing this for example my cluster consists of 7 nodes (3 control plane, 4 workers), across 2 Proxmox hosts and 3 Raspberry Pis—and I’d like to add more.
The good thing about a setup like this is that it’s easy to change! A few configuration changes, terraform apply, and you’re good to go. (Things get a bit more annoying with baremetal machines such as the Raspberry Pi, but not much.)
A quick note about the file structure I’ll use. I’ll separate the repository in two folders: one for infrastructure related files (what we’ll be doing in this post) and one for GitOps (apps and Kubernetes manifests).
├── infrastructure    # All Terraform files here
│   ├── variables.auto.tfvars
│   └── talos.tf
└── gitops            # GitOps using ArgoCD, setup in the future
You can split up Terraform files and terraform will automatically source all .tf files, so you can organize it however you like. I like to separate the variable assignments into its own file (terraform sources all *.auto.tfvars files) but it’s not necessary either.
I’ve gone through many refactoring phases and the code I’m running now looks a little bit different than what’s in the blog post. Don’t be afraid to refactor!
To use Terraform we need to add providers. I used the bpg/proxmox and siderolabs/talos for Proxmox and Talos Linux support:
terraform {
  required_providers {
    proxmox = {
      source  = "bpg/proxmox"
      version = "0.95.0"
    }
    talos = {
      source  = "siderolabs/talos"
      version = "0.10.1"
    }
  }
}
With bpg/proxmox 0.95.0 I ran into a bug during VM creation when running Proxmox 8.x:
Error: resizing disk: All attempts fail:
#1: task "UPID:dorne:0016FBC6:2304690D:69BE4B00:resize:112:root@pam:" failed to complete with exit code: disk 'scsi0' does not exist
Updating Proxmox to 9.1.6 resolved it.
We also need to configure the Proxmox provider:
provider "proxmox" {
  insecure  = true
  endpoint  = "https://10.1.3.1:8006"
  username = "root@pam"
  password = "..."
}
You can (and maybe should) use an API token instead of username/password but I didn’t bother.
Either way it’s not good to commit credentials to git, so let’s move them to secret.auto.tfvars (add the file to .gitignore):
username = "root@pam"
password = "..."
This will get loaded automatically but we need variable blocks and reference them using var:
variable "username" {
  type      = string
}
variable "password" {
  type      = string
  sensitive = true
}

provider "proxmox" {
  username = var.username
  password = var.password
}
I’d like to validate that the Proxmox connection works but Terraform seems to recognize that it’s not used yet, so it won’t try to connect yet. Let’s continue.
I’ll be using more variables in the future but to avoid unnecessary boilerplate I won’t always list the variable blocks. Sometimes I’ll just use a var.endpoint or endpoint = "https://10.1.3.1:8006" and the implication is that there’s a variable "endpoint" { ... } block somewhere. Hiding them in variables.tf feels nice.
Talos Linux has an image factory where you can find images to download. It’s a helpful tool as there are many parameters you can tweak to get the image you want.
The settings I chose are:
- Cloud server (we’ll install on Proxmox)
- I used version 1.12.6
- Nocloud (again, Proxmox)
- amd64
- The
qemu-guest-agentSystem extension (important for Proxmox) (Note thatiscsi-toolsandutil-linux-toolsare also required for Longhorn.)
You’ll receive an image schematic ID, for example: ce4c980550dd2ab1b17bbf2b08801c7eb59418eafe8f279833297925d67c7515.
You can download this to Proxmox manually but Terraform can automate that.
To make it easier to update I broke it out to variables:
talos_version          = "1.12.6"
talos_image_factory_id = "ce4c980550dd2ab1b17bbf2b08801c7eb59418eafe8f279833297925d67c7515"
And then reconstruct the download url and tell Proxmox to download it like so:
resource "proxmox_virtual_environment_download_file" "talos_image" {
  content_type            = "iso"
  datastore_id            = "local"
  node_name               = "dorne"
  url                     = "https://factory.talos.dev/image/${var.talos_image_factory_id}/v${var.talos_version}/nocloud-amd64.raw.xz"
  decompression_algorithm = "zst"
  file_name               = "talos-v${var.talos_version}-nocloud-amd64.img"
  overwrite               = false
}
Note that datastore_id should match Proxmox storage that can contain images and node_name should match the name of the Proxmox node (Proxmox can manage multiple machines/nodes, this one is called dorne).
Now we can test that our Proxmox provider is wired correctly:
terraform init
terraform plan
If everything is okay Terraform should tell you that it wants to create a resource. Let’s execute the download:
terraform apply
And it should show up in the Proxmox GUI.
Creating a VM is straightforward but there are a few settings we need to get right. Here’s a Terraform resource that will create a Talos Linux VM:
resource "proxmox_virtual_environment_vm" "talos" {
  name            = "talos-cp1"
  tags            = ["terraform", "talos"]
  node_name       = "dorne"
  on_boot         = true
  stop_on_destroy = true

  agent {
    enabled = true
  }
  disk {
    datastore_id = "local-lvm"
    file_id      = proxmox_virtual_environment_download_file.talos_image.id
    interface    = "virtio0"
    iothread     = true
    discard      = "on"
    size         = 20
  }
  initialization {
    datastore_id = "local-lvm"
    ip_config {
      ipv4 {
        address = "10.1.4.10/8"
        gateway = "10.0.0.1"
      }
    }
  }
  cpu {
    cores = 4
    type  = "x86-64-v2-AES"
  }
  memory {
    dedicated = 4 * 1024
    floating  = 4 * 1024
  }
  network_device {
    bridge = "vmbr0"
  }
  operating_system {
    type = "l26"
  }
}
- The VM in Proxmox will be called
talos-cp1on thedorneProxmox node (like before). - It’s important to enable the QEMU guest agent (which we also enabled in the image factory).
- Using a raw image (instead of an
.iso) avoids the installation process as it directly boots from the image. The raw image also enables cloud-init configuration (theinitializationblock), which allows us to set a fixed IP (10.1.4.10) and set the gateway (my router, at10.0.0.1). - I create it with 4 CPU cores, 4GB of memory, and an OS disk size of 20 GB. This is fine to start with but you may run out of RAM or disk size when you start adding applications (like I did). Bumping up to something like 8 GB RAM and 40 GB storage is probably a good idea.
- There are some extra settings there like the cpu and operating system type that I had to have but I can’t explain why.
At first I got this error when creating a VM.
proxmox_virtual_environment_vm.controller[0]: Creating...
╷
│ Error: creating custom disk: fish: Unexpected end of string, quotes are not balanced
│ /bin/bash -c 'export TRY_SUDO_USE_SUDO=0; set -e; _try_sudo_check(){ if [ -z "${_try_sudo_cached:-}" ];
then _try_sudo_use_sudo="${TRY_SUDO_USE_SUDO:-0}"; _try_sudo_cached=1; fi; }; try_sudo(){ _try_sudo_check; if
 [ "$_try_sudo_use_sudo" = "1" ]; then sudo "$@"; else "$@"; fi; };
file_id=local:iso/talos-v1.12.4-nocloud-amd64.img; file_format=raw; datastore_id_target=local-lvm; vm_id=112;
 disk_options=aio=io_uring,backup=1,iothread=1,ssd=1,discard=on,cache=none,replicate=1; disk_interface=scsi0;
 source_image=$(try_sudo /usr/sbin/pvesm path $file_id); imported_disk=$(try_sudo /usr/sbin/qm disk import
$vm_id $source_image $datastore_id_target -format $file_format | grep unused0 | cut -d : -f 3 | cut -d \'"'"'
 -f 1); disk_id=${datastore_id_target}:$imported_disk,$disk_options; try_sudo /usr/sbin/qm set $vm_id
-${disk_interface} $disk_id'
│
Turns out I shouldn’t use fish as the login shell on my Proxmox host as the Terraform provider uses ssh for some things.
The above will create a single VM but for fun I wanted more.
Let’s go with 3 VMs and let’s break it out in a variable:
nodes = [
  {
    hostname = "talos-cp1"
    ip       = "10.1.4.10"
    cores    = 4
    memory   = 4 * 1024,
  },
  {
    hostname = "talos-cp2"
    ip       = "10.1.4.11"
    cores    = 4
    memory   = 4 * 1024,
  },
  {
    hostname = "talos-cp3"
    ip       = "10.1.4.12"
    cores    = 4
    memory   = 4 * 1024,
  }
]
The declaration looks like this:
variable "nodes" {
  description = "List of nodes and their configurations."
  type = list(object({
    hostname = string
    ip       = string
    cores    = number
    memory   = number
  }))
}
Looping in Terraform feels a bit weird to me as the syntax doesn’t wrap the whole resource, but it’s just a field that creates an each variable you can reference. Something like this (leaving out unchanged fields):
resource "proxmox_virtual_environment_vm" "talos" {
  for_each        = { for node in var.nodes : node.hostname => node }
  name            = each.key
  cpu {
    cores = each.value.cores
    type  = "x86-64-v2-AES"
  }
  memory {
    dedicated = each.value.memory
    floating  = each.value.memory
  }
  initialization {
    datastore_id = "local-lvm"
    ip_config {
      ipv4 {
        address = "${each.value.ip}/8"
        gateway = "10.0.0.1"
      }
    }
  }
  # ...
}
This should now create 3 VMs, with different hostnames and IPs.
Extending to multiple Proxmox hosts is straightforward, we just need to specify node_name and make sure the datastore matches with what exists on the node. Something like this might get you started:
locals {
  lvm_datastore = {
    dorne      = "local-lvm"
    lannisport = "other-lvm"
  }
}

resource "proxmox_virtual_environment_vm" "talos" {
  for_each  = { for node in var.nodes : node.hostname => node }
  name      = each.key
  node_name = each.value.proxmox_node

  initialization {
    datastore_id = local.lvm_datastore[each.value.proxmox_node]
  }
}
You also need to on both nodes (make sure to choose a matching datastore, local matched both for me):
resource "proxmox_virtual_environment_download_file" "talos_image" {
  for_each     = toset(["dorne", "lannisport"])
  node_name    = each.key
  datastore_id = "local"
  # ...
}
Now we need to configure Talos Linux. We’ll essentially try to replicate the talosctl apply-config commands from the documentation via Terraform.
First some variables to make life a little easier:
talos_version      = "1.12.6"
kubernetes_version = "1.35.2"
cluster_name       = "talos-cluster"
Then we’ll need three configurations: machine secrets, client config, and the control machine config. The three nodes will be control nodes but if you want to create worker nodes you need a specific config for those, but I’ll skip that in this post.
resource "talos_machine_secrets" "machine_secrets" {
  talos_version = "v${var.talos_version}"
}

data "talos_client_configuration" "client_config" {
  cluster_name         = var.cluster_name
  client_configuration = talos_machine_secrets.machine_secrets.client_configuration
  endpoints            = local.node_ips
  nodes                = local.node_ips
}
The client config references the machine secrets and needs to list the IP addresses for all nodes and its endpoints (the control nodes, for me that’s all the nodes). I use a local to collect those:
locals {
  node_ips = [for node in var.nodes : node.ip]
}
The control machine config follows a similar pattern:
data "talos_machine_configuration" "control_machine_config" {
  cluster_name       = var.cluster_name
  cluster_endpoint   = local.cluster_endpoint
  machine_type       = "controlplane"
  machine_secrets    = talos_machine_secrets.machine_secrets.machine_secrets
  kubernetes_version = "v${var.kubernetes_version}"
  talos_version      = "v${var.talos_version}"

  config_patches = []
}
Of note here is cluster_endpoint which for us will be the first control node IP. We’ll change it later to a Virtual IP (VIP) to avoid a single point of failure, but for now:
locals {
  node_ips                = [for node in var.nodes : node.ip]
  primary_control_node_ip = local.node_ips[0]
}
What about config_patches? They correspond to the patches you apply with talosctl patch and we need to use it for a few things. One thing is to specify the install image so Talos pulls from the image factory during upgrades:
locals {
  install_image = "factory.talos.dev/installer/${var.talos_image_factory_id}:v${var.talos_version}"
}

data "talos_machine_configuration" "control_machine_config" {
  config_patches = [
    yamlencode({
      machine = {
        install = {
          disk  = "/dev/vda" # virtio0 disk
          image = local.install_image
        }
      }
    })
  ]
}
Talos will boot fine without it but if I understand things correctly during updates it’ll then use the official upstream image and will remove any extensions (such as the QEMU agent we need).
Another thing we need to patch is to allow our control nodes to schedule workloads because we don’t have any worker nodes:
data "talos_machine_configuration" "control_machine_config" {
  config_patches = [
    yamlencode({
      cluster = {
        allowSchedulingOnControlPlanes = true
      }
    })
    # Other patches here...
  ]
}
Then we’ll need to apply the configurations to our nodes:
resource "talos_machine_configuration_apply" "control_machine_config_apply" {
  for_each                    = { for node in var.nodes : node.hostname => node }
  depends_on                  = [proxmox_virtual_environment_vm.talos]
  client_configuration        = talos_machine_secrets.machine_secrets.client_configuration
  machine_configuration_input = data.talos_machine_configuration.control_machine_config.machine_configuration
  node                        = each.value.ip
}
Note how we loop through the nodes and target them individually using their IPs, and that we added a dependency to proxmox_virtual_environment_vm.talos to ensure that the VMs are created before we try to apply the configuration.
If you terraform apply this then the VMs will spin up and the nodes will leave Maintenance mode but get stuck in Booting and will print something like:
etcd is waiting to join the cluster, if this node is the first node of the cluster,
please run `talosctl bootstrap` against one of the following IPs:
[10.1.4.10]
(a bunch of other warnings and errors)
With Terraform, bootstrapping is done like this:
resource "talos_machine_bootstrap" "bootstrap" {
  depends_on           = [talos_machine_configuration_apply.control_machine_config_apply]
  client_configuration = talos_machine_secrets.machine_secrets.client_configuration
  node                 = local.primary_control_node_ip
  endpoint             = local.primary_control_node_ip
}
The nodes seem to be running fine and they all signal a Healthy Running state in the Proxmox console. But how do we access them?
We need the Talos and Kubernetes configuration files:
resource "talos_cluster_kubeconfig" "kubeconfig" {
  depends_on           = [talos_machine_bootstrap.bootstrap]
  client_configuration = talos_machine_secrets.machine_secrets.client_configuration
  node                 = local.primary_control_node_ip
}

output "talosconfig" {
  value     = data.talos_client_configuration.client_config.talos_config
  sensitive = true
}

output "kubeconfig" {
  value     = resource.talos_cluster_kubeconfig.kubeconfig.kubeconfig_raw
  sensitive = true
}
And generate them like so:
terraform output -raw talosconfig > talosconfig.yaml
terraform output -raw kubeconfig > kubeconfig.yaml
# Should be ok
talosctl --talosconfig ./talosconfig.yaml health -n 10.1.4.10
# Look at pods
kubectl --kubeconfig ./kubeconfig.yaml get pods -A
You can move them to ~/.talos/config and ~/.kube/config, or set TALOSCONFIG and KUBECONFIG to avoid specifying them all the time.
At this point we have a functional cluster but first I want to change a few things.
Networking, the thing that keeps your average homelabber awake at night. As if that’s not enough, in true homelabber fashion we’ll create some extra problems for ourselves just because.
I wanted to use Cilium for proxying and as the Container Network Interface (CNI) which means we have to disable them on the Talos nodes. New config_patches:
data "talos_machine_configuration" "control_machine_config" {
  config_patches = [
    # Disables the Flannel, the default CNI for Talos
    yamlencode({
      cluster = {
        network = {
          cni = {
            name = "none"
          }
        }
      }
    }),
    # Disables kube-proxy, the default proxy service
    yamlencode({
      cluster = {
        proxy = {
          disabled = true
        }
      }
    })
    # ...
  ]
}
If we rebuild the nodes we’ll see that talosctl health will stop at not ready:
waiting for all k8s nodes to report ready: some nodes are not ready: [talos-cp1-tmp talos-cp2-tmp talos-cp3-tmp]
This is to be expected as we haven’t installed Cilium yet. First we need to manually install the Gateway CRDs as they need to exist before we install cilium (because we want to use it for Gateway management later as well):
kubectl apply -f https://github.com/kubernetes-sigs/gateway-api/releases/download/v1.2.1/standard-install.yaml
Then we’ll install Cilium using Helm:
helm repo add cilium https://helm.cilium.io/
helm repo update
helm install cilium cilium/cilium \
  --namespace kube-system \
  --version 1.19.2 \
  --set kubeProxyReplacement=true \
  --set k8sServiceHost=10.1.4.10 \
  --set k8sServicePort=6443 \
  --set l2announcements.enabled=true \
  --set externalIPs.enabled=true \
  --set gatewayAPI.enabled=true \
  --set ipam.mode=kubernetes \
  --set operator.replicas=1 \
  --set securityContext.privileged=true
There are a bunch of options here, the most notable:
-
kubeProxyReplacement=trueuse it as akube-proxyreplacement. -
k8sServiceHost=10.1.4.10target the first control node. -
l2announcements.enabled=trueuse L2 announcements to give out IP addresses. -
externalIPs.enabled=trueallow us to set fixed IPs manually. -
gatewayAPI.enabled=trueenable the Gateway API that we’ll use in later posts. -
securityContext.privileged=trueneeded to work with Talos.
With this installed talosctl health should after a while return all OK again.
Let’s try out a good old classic to see if it works: the nginx test. We’ll use LoadBalancer to get an external IP:
kubectl run nginx --image=nginx --port=80
kubectl expose pod nginx --type=LoadBalancer --port=80
Get the IP:
$ kubectl get svc nginx
NAME    TYPE           CLUSTER-IP       EXTERNAL-IP   PORT(S)        AGE
nginx   LoadBalancer   10.107.132.202        80:30952/TCP   2s
Oh right, we haven’t configured load balancing for Cilium yet. Time for our first Kubernetes manifest!
apiVersion: "cilium.io/v2"
kind: CiliumLoadBalancerIPPool
metadata:
  name: first-pool
spec:
  blocks:
    - start: 10.1.4.101
      stop: 10.1.4.255
---
apiVersion: "cilium.io/v2alpha1"
kind: CiliumL2AnnouncementPolicy
metadata:
  name: l2-announcement
spec:
  interfaces:
    - eth0
  loadBalancerIPs: true
This tells Cilium to assign load balancing IPs in the range 10.1.4.101–10.1.4.255.
Apply:
kubectl apply -f cilium_config.yaml
After a while (yes, I hate waiting) kubectl get svc nginx should show an external IP that we can visit in the browser to verify that yes, we have a running app!
Mother always nagged me to clean up after myself:
kubectl delete pod nginx
kubectl delete svc nginx
Kubernetes is supposed to be a resilient thing but we’ve introduced a central point of failure by using the first control node as the endpoint. If that one node goes down then the entire cluster is now unreachable.
We’ll fix that with a Virtual IP, where all control nodes will share a single IP. If one of them goes down then one of the others will take over. (How? Must be magic!)
Anyway, let’s designate a VIP:
cluster_vip = "10.1.4.100"
Use it for the cluster endpoint:
locals {
  cluster_endpoint = "https://${var.cluster_vip}:6443"
}
And we’ll also need to patch the nodes to tell them to use the VIP:
data "talos_machine_configuration" "control_machine_config" {
  config_patches = [
    yamlencode({
      machine = {
        network = {
          interfaces = [{
            interface = "eth0"
            vip = {
              ip = var.cluster_vip
            }
          }]
        }
      }
    })
  ]
}
For it to work we also need to specify an interface. eth0 happened to work for me (verify with talosctl get links).
We also need to update the Cilium install parameters to target the VIP:
--set k8sServiceHost=10.1.4.100
To see that it gets assigned we can use talosctl get addresses; one of the nodes should be assigned the VIP. If we regenerate kubeconfig it should also contain the VIP and not the node IPs, so if kubectl can reach the cluster then all is good.
This is a good time to destroy and go through the bootstrap again, to make sure everything can be reconstructed without issues. (Keep in mind that existing talosconfig and kubeconfig will be invalidated.)
One last thing I’d like to mention is how to add your own nameserver. I’ve got my DNS overrides on my router at 10.0.0.1 that I’d like the nodes to pickup. Here’s how to patch it, with a fallback to 1.1.1.1:
data "talos_machine_configuration" "control_machine_config" {
  config_patches = [
    yamlencode({
      machine = {
        network = {
          nameservers = ["10.0.0.1", "1.1.1.1"]
        }
      }
    })
  ]
}
And with that we have a functional Kubernetes cluster that we can easily tear down and rebuild.
Cilium has been working well but with one caveat: as I’m writing this Cilium can’t yet route to services with their own TLS certificate properly. This means I can’t add a route for my domain that internally redirects to a service with their certificate, such as Proxmox.
To make proxmox.hietala.xyz work I use Caddy with this config:
proxmox.hietala.xyz:80 {
    reverse_proxy https://10.1.3.1:8006 {
        transport http {
            tls_insecure_skip_verify
        }
    }
}
Other services (with http endpoints) I use Cilium and I hope to be able to remove Caddy in the near future. Caddy is great but fewer dependencies is nice.

 点赞
点赞 收藏
收藏 点踩
点踩 分享
分享