How I Write Blog Posts with Obsidian

You've probably run into some Obsidian evangelist espousing some convoluted system of organizing all their notes, and building some knowledge base. Heck, I was just involved in a conversation about Personal Knowledge Management. This isn't that article.
My personal use of Obsidian tends to be simple. I build into it the tools that I need to get things done, to make things easier. There is a saying (which I can't locate, so I'll paraphrase) that a system should only be as complicated as needed, and nothing more. The idea is there is no reason to build a Rube Goldberg machine when all you really need is a wrench. That's the approach I take: use a wrench to bolt on a few tools, and tighten things up where necessary.
So, this article will walk through how I work with things now. This system has evolved a bit over the last few weeks, and is likely to evolve further. But the primary idea is, and will remain: keep it simple, but make it useful.
Planning
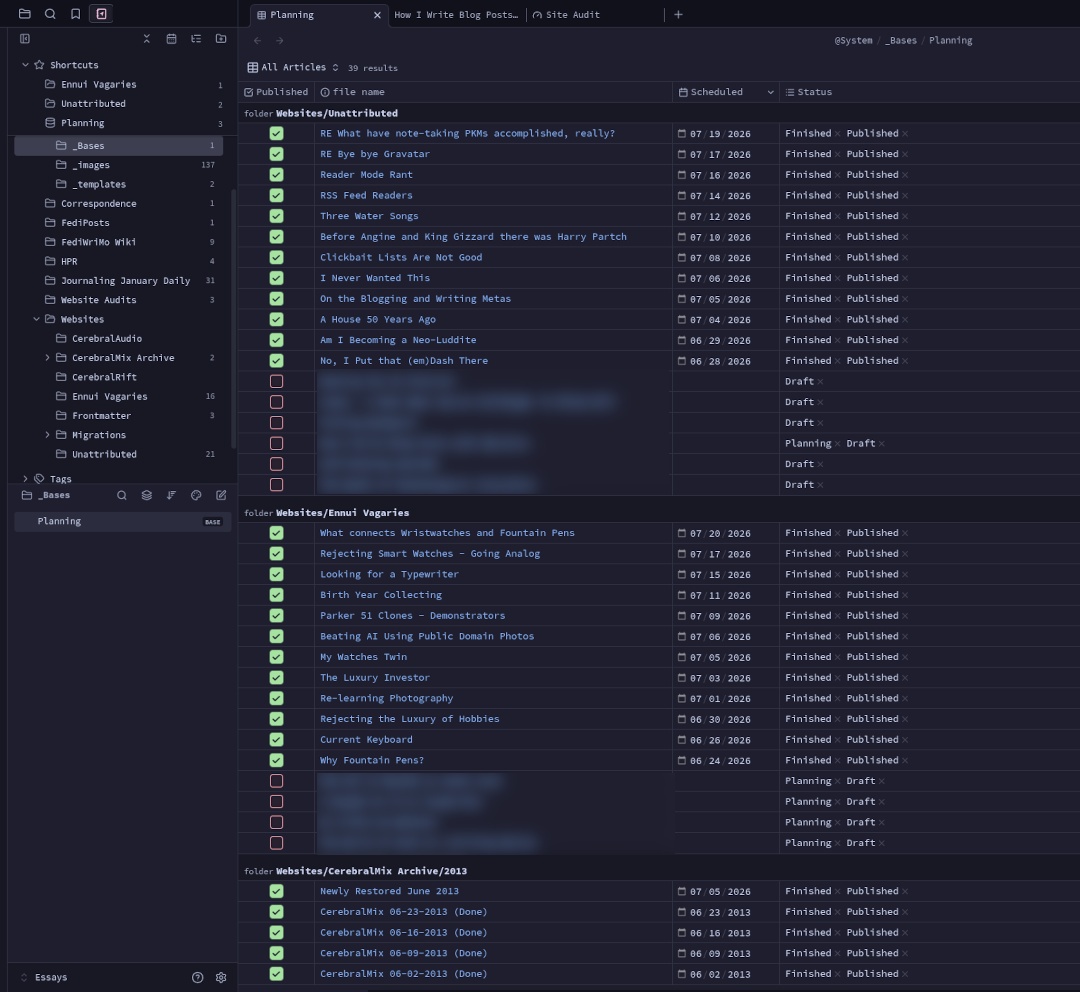
When I switched from WordPress to write.as, the biggest thing I “lost” was having a way to plan the articles that I wanted to work on. Obsidian recently added a feature called Bases that made it simple to set up a table containing all the articles for all three of my sites:
View of the main planning table. Unpublished articles blurred—no spoilers!;)
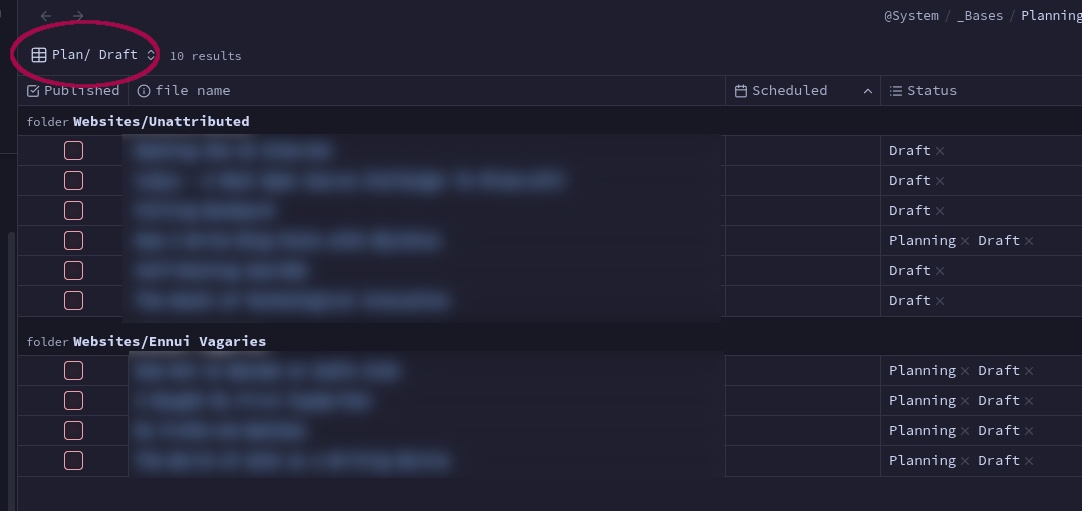
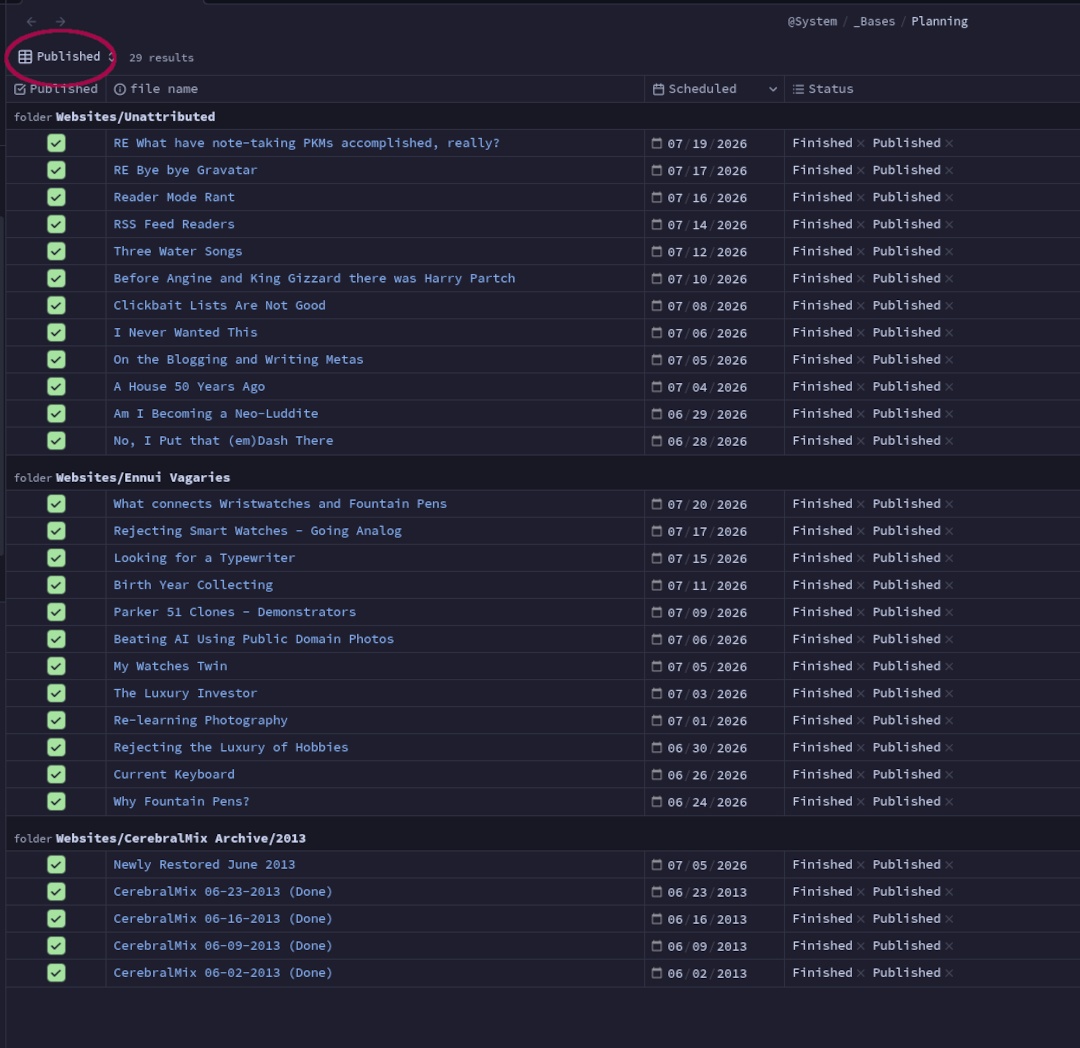
The simplicity here is that the table quickly lets me see which articles I have published, which are in the planning / drafting stage, and the scheduled date for the articles. But, looking at a table this big could be tricky to navigate. Fortunately, I have a couple of alternate views available:
The Plan / Draft view lets me see just the articles I am working on.
And the Published view lets me see what I've already posted.
There are two “genius” parts to this system. First, all this information is part of the article, it's not some extra information that I need to keep track of. Second, I can update the “Published”, “Scheduled” and “Status” fields fr…

 点赞
点赞 收藏
收藏 点踩
点踩 分享
分享